Showing posts with label Fish and Seafood. Show all posts

Saturday, October 27, 2012

WORTH SHARING A MILLION TIMES: MISO AND MAPLE SYRUP GLAZE


I think of this blog pretty much every day but I’m a terrible friend to it. I neglect it and don’t really take care of it. But today is a day I decide to make an effort to make it happy… to make it smile!

Be prepared, this terribly simple recipe is super delectable and your entire family will love it, including kids and babies… I’ve tried it and it works. You want a nice fast and healthy dinner? This is the best recipe you’ll have tried in months!! I made mine with nice jasmine rice and garlic spinach. The fish took 12 minutes to make (4 to prepare, 8 to cook), which is less than the rice, which took 20! Try to beat that Jamie Oliver with your 30 minutes meal!!!

Picture taken for Ricardo's website... I didn't have time to take a picture myself!


MISO AND MAPLE SYRUP GLAZE
Makes 2 large fillets or 4 fish steaks
(Good for salmon, trout, pork and chicken)

INGREDIENTS
¼ cup maple syrup
2 tbsp miso paste
2 tbsp grapeseed oil (or olive oil)
2 green onions or 1 shallot, finely chopped
1 tbsp sambal olek (or an asian hot sauce)
1 tsp curry powder
½ tsp Sichuan peppercorns, crushed

PREPARATION
Sauce
Blend together all of the ingredients.

Cooking the fish
Place 4 fish steaks or 2 large fillets of your choice on a baking sheet lined with parchment paper (the sauce will caramelized once cooked) and generously brush with the miso and maple syrup glaze. Bake in the center of the oven, under the broiler, for 5 to 10 minutes, depending on the type of fish, or until cooked (be careful not to overcook your fish). Serve hot with rice and a nice green vegetable!!


Tuesday, December 13, 2011

Red Snapper For An Easy Weeknight


I find that I always eat the same kind of fish… and it gets me bored. I absolutely love salmon in all its forms (except when it’s overcooked) but I need a change once in a while. So the other day I was at Adonis, an amazing supermarket here in Montreal (we don’t have Whole Foods yet but we have Adonis!) and was looking at the fish they had… and they had this great looking Red Snapper that got me going! I found a nice looking recipe on the web and modified it a little. It was fantastic! If you try it with my previous quinoa recipe I promise you a great meal!

CREOLE RED SNAPPER FILLETS
Makes 2 servings

INGREDIENTS
2 red snapper fillets (or 1 entire fish if you know how to make your own fillets!)
4 tbsp butter, cut in small dices
1 garlic clove, minced
6 drops of Worcestershire sauce
1 tbsp Creole or Cajun seasoning (with salt)
Pepper

PREPARATION
Preheat your oven at 400˚F.


In a small bowl, melt the butter. Add the garlic, Worcestershire, Creole seasoning and pepper. Mix well.

Place your fillets in an ovenproof dish. Evenly spread the butter mixture on top. Cook in the oven for about 10 minutes. 


Saturday, December 3, 2011

Little Quicky: Scallop Carpaccio


I’m in the mood to share this little recipe with all of you lovely readers. Because it is nice and sunny in Montreal and because I’m having a relaxing moment on this Saturday while my kids are napping (both at the same time is what I call a miracle!). I don’t have much time but I believe I have just enough to share this simple recipe with you. Ok, it’s seafood – AGAIN - I hope you don’t mind too much. I’ll give it a break after this and switch to some meat… and sugar (I’m due for a good desert!). If you’re a seafood lover, then I guess you are well served these days!

FRESH SCALLOP CARPACCIO
Makes 4 servings

INGREDIENTS
6 big scallops
2 green scallions, finely sliced
2 tbsp excellent olive oil
2 tbsp fresh lime juice
1 tbsp poppy seeds
Maldon sea salt flakes


PREPARATION
In a small bowl mix together the olive oil, lime juice and scallions.


In a small skillet, slightly toast the poppy seeds. Be careful not to burn them. Take off the heat and let cool.


With a good knife, delicately slice your scallops. The slices should be no more than 3mm. Place them on small serving plates.


Drizzle the scallops with the olive oil and lime juice mixture. Decorate with a few pinches of roasted poppy seeds. Finish off with a nice pinch of sea salt flakes. Serve and enjoy immediately.


Monday, November 28, 2011

Oyster Season Is Still On So Have Some More


Because it’s still oyster season I’m going to write again about the sea’s gem! Of course, some of you probably hate the damn thing and I kind of understand you. Who wants to eat a raw, slimy and salty mollusk? Not many. But trust me, once you try the slimy beast, you might realize how good and refined it actually is. And you just might get addicted to it, even if it’s against your own good will!

There are easier ways to start eating oysters than to have them naked and raw. Although they’re not my favorite once cooked, they can be easier to gulp on once they’re not raw. Plus, if you add some flavor to them, a taste to which you might not be accustomed to becomes more subtle. But take it to the next level fast; cooked oysters might be good but they’re not the real deal. And if you want to pass as an oyster lover, people won’t believe you if the only way you like yours are cooked with a bunch of unnecessary ingredients on top.

The best way to eat an oyster is still raw with a hint of lemon but hey, if you’re gonna eat a lot of them and often, why not try different variations? Here are some of my favorites!


OYSTER WITH CUCUMBER AND MINT SALSA

INGREDIENTS  
1 small Lebanese cucumber, deseeded and finely diced
½ red onion or shallot, finely chopped
2 tbsp soy sauce
4 tbsp rice vinegar
2 tbsp lemon juice
1 tbsp fresh mint, chopped

PREPARATION
In a bowl, mix of the ingredients. Spoon a little on top of freshly opened oysters. Serve immediately .

Note: Add the mint to the salsa only when ready to serve. If not, the mint will become brown.  


BACON AND GRUYÈRE OYSTERS

INGREDIENTS
¼ cup 35% cream
1 tbsp olive oil
1 shallot, finely chopped
¼ cup grated gruyere cheese
1 tbsp Dijon mustard
4 slices of bacon cut in small pieces
6 oysters

PREPARATION
Open the oysters and put them in a bowl with the juice. Keep the bottom of the shells.

In a skillet, cooked the bacon pieces until they become nice and crispy. Place on an absorbing paper and take off the excess fat. Set aside.

In a saucepan, heat the cream and reduce it by half.

In a skillet, cook the olive oil and the shallot. Add the cream and the oyster juice. Blend well.

When ready to serve, preheat your oven to broil. Place the bottom shells on a cooking sheet and put an oyster back in each shell. Put a small spoonful of the cream mixture on top of the oyster and top off with some gruyere cheese and crispy bacon. Put in the oven and cook until the cheese has melted and is slightly golden.

Note: Be very careful, the shell will be dangerously hot when you take it out of the oven so it’s better to eat with a small fork.


Wednesday, October 19, 2011

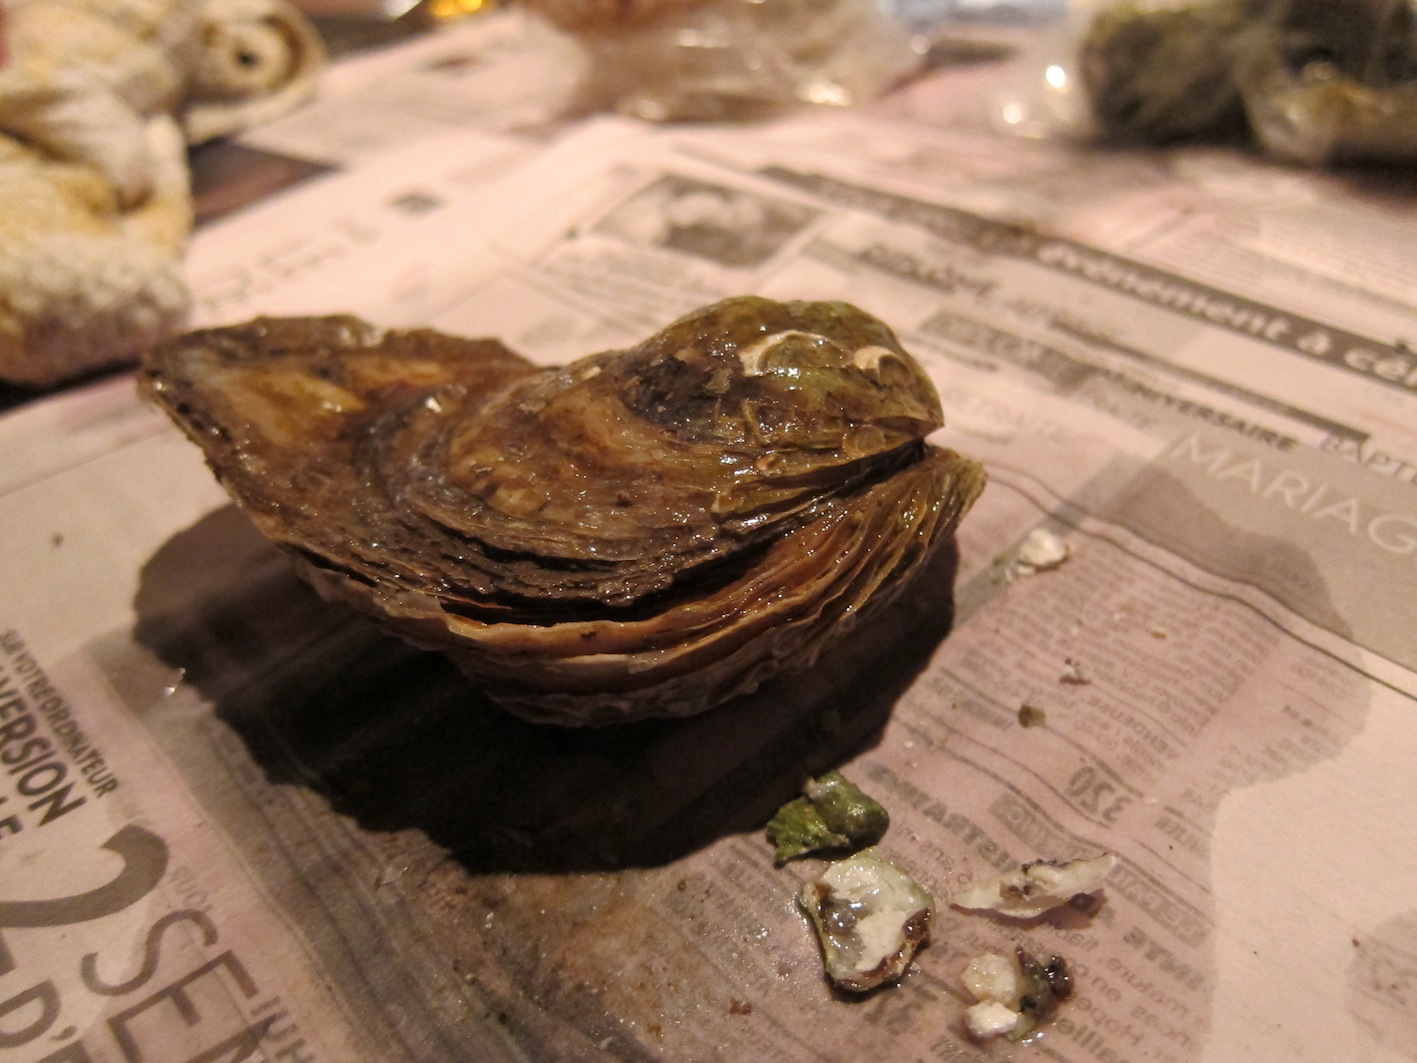
Our Own Little Oyster Party


If I were stuck on an island and I had no choice but to eat one thing forever, it would be oysters. It is most certainly one of the things I prefer in life. Those juicy molluscs  are simply amazing to me! You can find them all year round at your favourite fish store but the best time to have them, the year’s high season, is in October, November and December.

For the past 2 oyster seasons I’ve been pregnant. And with being pregnant comes a big warning: do not eat any live bate. Which means, no raw oysters while you’re pregnant. So for the past 2 years I’ve been missing out on one of my favourite things in the world, which totally sucks. Ok, I’ve got 2 amazing kids but still… it’s really hard not to eat something you love for such a long time. Think about it… if you couldn’t eat chocolate for 2 years, how would you feel?


The other day my husband and I caught up with lost time and had our own little oyster party. It was a real mollusc fiesta, the best party ever!! We bought 5 different kinds of oysters and just ate them with fresh lemon juice, our favourite way to eat the small beast. Of course, you can eat oysters all sorts of way but to us, lemon stays the best.


Atlantic oysters tend to be briny and crisp on the tongue, you can taste the saltiness of the ocean. Pacific oysters are less salty in flavour and have a creamier, mineral type of taste; they can be fruity and a bit sweet! Kumamoto oysters resemble the Pacific oyster, but are more complex and quite mild, with a creamy texture and buttery finish. Try all types and see the difference!!

The oysters we ate are all Atlantic oysters. To be more specific, they all come from Prince Edward Island.

Cavendish: very close to the malpèque; mildly salty and sweet.
Giant Malpèque: classic oyster, easiest to eat; light in flavour with a mild finish. 
J’adore: chewy, filled with juice and delicate in taste. 
Lucky Limes: mildly salty and sweet. 
Raspberry point: very salty and sweet; very tender.

As for facts, did you know that 4 medium-size oysters provide the recommended daily allowance of selenium, iron, manganese, phosphorus, zinc and vitamin B12?

Plus, with only 10 calories per oyster, you can eat a whole lot of them without feeling guilty!
If you’ve never had any oysters before, please do me a favour and try at least one. Ask your fish guy to show you how to open one and then try it yourself. If you’re opened to new tastes, this is a taste you might get hooked to!!

Tuesday, September 27, 2011

Super Easy Weekday Fish Night


I don’t know what it is with fish these days but I’m totally digging it on weeknights. I’m terribly sorry for those who don’t like fish but I just can’t resist a good sea beast! My husband would love for me to cook meat everyday… a meal isn’t’ complete without the meat, he says… but I still manage to include loads of fish in our diet by making a variety of tasty recipes.

The other day my fridge was close to empty so I had to figure out a different way to cook my Cod. Have you ever done that? Open the fridge and see what’s inside? Really look closely. If you’re one of those who buys nothing but the strict essential, then your fridge is probably empty. But if you’re one like me who stacks up on loads of different little non-perishable products, then you probably have something in there that could be mixed with something else, and then something else! The addition of all the ingredients will end up either making a magical meal… or a disgusting one (that happens sometimes when you take a risk!). Opening the fridge and working this way is my method of choice during the week. I rarely have a planned recipe. I just love going with the flow and improvising on a weeknight.

This fish was one of my successes!! Super simple, all you need are a few ingredients. Then you pop the goody in the oven and you wait! Make a nice vegetable on the side and no one at the table should be complaining!

Oh yeah and please forgive me, I was going so fast (that happens sometimes when you have 2 babies!!) I didn’t have time to take a lot of pictures… I hope you still get a good idea of what it looks like and how to make it.

FREESTYLE BLACK OLIVE WHITE FISH
Makes about 2 servings

INGREDIENTS
2 Cod fillets (or other white flesh fish)
1 cup mayonnaise
4 garlic cloves, finely chopped
1 cup mushrooms, sliced
½ cup black olives, pitiless
1 tbsp fresh thyme
1 tbsp fresh chives
Salt & pepper

PREPARATION
Preheat your oven at 425˚F.

In a small bowl, mix the mayo, garlic, salt and pepper.

Put you fillets in an ovenproof dish. Spread the mayo on top of the fillets. Cover them with the mushrooms, olives, thyme and chives.

Put in the oven and cook for 10-12 minutes or until the flesh is tender and flaky. 


Monday, September 12, 2011

The Aftermath: Stuffed Eggs With Matane Shrimps


Well, the tornado has passed and the quiet wind of September is settling in again. No, I’m not talking about Irene, I’m talking about my son’s baptism. An event like that can really take over a household for a few days, or even a full week! I got so absorbed into the eye of the tornado that I quite frankly had to put aside my urge to write a new page in my blog. There was simply not time to write; but there was time to cook!

But the page has been turned and I can move on with my normal life. One where cooking is enjoyable and not just a matter of success. Thanks to a few of you, I got some great ideas for my fancy buffet. I made a delectable menu and had raving reviews for the food. I know this might sound a little cocky but I even impressed myself with a few things. You see, I tried quite a bit of new recipes and even took a new angle to my style. I usually make a lot of fish and raw foods. This time, I added a lot of meat and cooked foods!! Not an easy challenge for me, and it was hard to get around to creating my menu but in the end the challenge was great and I ended up making one of my best buffets yet. To top it all off, I believe I have regained my love for cooking, which had been lost along the way this summer. Too much vacationing can really get to your head. Now I really feel like trying some new stuff and taking things a notch higher. That’s what fall should be about.

If you don’t mind, I’ll present to you what I made in my next few blog entries. You can recreate the whole thing after if you like, or make 1 recipe at a time when necessary. The first recipe was a mad success. A modern twist on a classic recipe: stuffed eggs. Only when you make them chic and fancy, no one can resist a good egg. Simple to make ahead, finish them just before the guests arrive. Perfect as an appetizer, you can’t go wrong with this one.  

HARD BOILED EGGS STUFFED WITH MATANE SHRIMP
Makes 24 half eggs
 
INGREDIENTS
12 eggs
1/3 pound Matane shrimps, cooked
2-3 tbsp mayonnaise (home made is ideal)
½ tsp Dijon mustard
1 green shallot, finely chopped
1 tbsp cilantro, finely chopped
Salt & pepper.
Cilantro for decoration
Salmon roe for decoration

PREPARATION
In a saucepot, put the eggs in cold water. Bring the water to a boil. Once it’s boiling, take off the heat and let the eggs cook for 15 minutes. Put the eggs in cold water to stop the cooking. When they are cold, peel and wash the eggs. Cut the in half and, with a small spoon, take out the egg yolk.

In a bowl, mix together half of the egg yolks with the shrimps, mayo, Dijon, shallot and cilantro. Add salt and pepper. Adjust taste if necessary.


Cut a tiny piece off the bottom of each egg half so that they stand upright. Fill them with the egg and shrimp mixture. Decorate with a piece of cilantro and salmon roe.

Thursday, August 11, 2011

Copying B&G Oysters Greatness With Striped Bass


During my vacation I got to escape the craziness of having kids for one whole day, thanks to my parents who accepted to babysit. That day was memorable for all sorts of reasons, one of them being the restaurant where my husband and I went for dinner. We went to this great little Boston restaurant called B&G Oysters. Owned by renown chef Barbara Lynch, it wasn’t a surprise we landed in the right place for a night out on the town.

Besides indulging on some amazingly fresh oysters (which were opened right before our eyes), I ate a delicious plate of Striped Bass. The meat of a striped bass is white and its texture is between flaky and meaty. Its taste is rich and sapid. Above all, stripers are versatile; no matter what you feel like doing, from batter frying them to smoking them to poaching in court bouillon, striped bass can handle it.
When we came back home from our day trip, I couldn’t resist making my dad jealous by telling him what I had eaten: Striped Bass. He’s a huge fan of the fish and wouldn’t stop talking about having it for dinner. So I made him a deal he couldn’t resist: I offered not only to prepare dinner, but also to try to recreate the dish I had eaten at B&G Oysters. I always love a good challenge and this one, I felt, was one I could easily take on. And I did! I managed to reproduce (or copy!) a great dish just by instinct and memory. Although it lacked a little bit of finesse (I’ve mentioned this in my previous post but only had access to basic ingredients), it tasted damn good. And the meal certainly pleased my dad. That made my day!
STRIPED BASS LAID OVER FRESH CORN
Makes 4 servings


INGREDIENTS
Fish
1 pound fresh striped bass filet (skin on), cut in 4 equal pieces
Salt & pepper
1 tbsp olive oil

Corn
4 corn on the cob
1 tbsp sugar
¼ cup milk
1tbsp olive oil
1 shallot, minced
2 celery branches, cut in small sticks
¾ cup chicken broth
1 thick slice of bacon, cut in ¼-inch pieces
1 tbsp butter
1 tbsp fresh chive, finely chopped

Red Pepper Topping
1 red bell pepper
2 tbsp olive oil
1 tbsp white onion, minced
1 garlic clove, minced
Salt & pepper
1 tbsp flat parsley, finely chopped

PREPARATION
Red Pepper Topping

In the over, on the boiler or the BBQ, roast the red pepper. Once done, take off the skin and cut in tiny cubes. Set aside.


In a skillet, heat the oil over medium heat. Add the onion and the garlic and cook until tender. Lower the heat and add the red pepper dices. Let cook until the pepper is soft and tender. Season to taste with salt & pepper. Add the parsley just before serving.


Corn
In a large pot, boil some water with the sugar and milk. Cook the corn for about 6 minutes (more or less, depending on the size of the grain). Drain. Cut the grains off the cob and set aside.


In a skillet, heat the oil over medium heat. Add the shallot and the celery. Cook until tender. Add the chicken broth and season to taste with salt and pepper. Close the heat and add the butter. Your sauce will become nice and shiny. Add the chives just before serving.


In a small skillet, cook the bacon until it’s nice and crispy. Set aside. Add to the corn mixture just before serving.

Fish
Season the fish with salt and pepper. In a large skillet, heat the oil over high heat. Cook you fish, skin side down. You should cook ¾ of your time on the skin side and finish ¼ of the time on the flesh side. Be careful not to burn the skin. Striped Bass should be cooked thoroughly. It should take about 8 minutes.

SERVING
In a deep plating dish, lay some of the corn mixture (don’t forget to add the bacon and the chive before serving!). Add a piece of the fish on top of it, skin side up. Garnish with some of the red pepper mixture (don’t forget to add the parsley before serving!!). Et voilà! Enjoy! 

This is the original version from B&G Oysters

Wednesday, July 13, 2011

A Feisty Caribbean Sauce Called ‘Sauce Chien’


A couple of years back I spent a few months in the Caribbean. More precisely, I was on the island of Martinique. I know… I was really lucky! While I was there, I met a chef who was kind enough to teach me the local way of cooking. In exchange, I would spend some time in his restaurant, waitressing. Nothing too stressful (the island way!) and it was all worth it. It was such an amazing experience. On top of learning great recipes, I learned how to make local drinks (yummy!), and learned the true way of cooking when you’re in a tropical country: in a kitchen where flies are all over the place and ants make little trails along the walls. Lets just say the sanitary rules are not the same over there as the ones we have here, in North America!

A great way to give some kick to fish or meat in Martinique is by covering it with a sauce called ‘sauce chien’. It’s basically pickled onions. I love onions and vinegar so this really satisfies my taste and gives my food that special island kick. It’s a feisty, simple yet very effective sauce, one which is perfect to enhance your summer meals. I even use the leftover sauce in my salads. Why not? After all, it’s made of onions and vinegar!

SAUCE CHIEN
 
INGREDIENTS
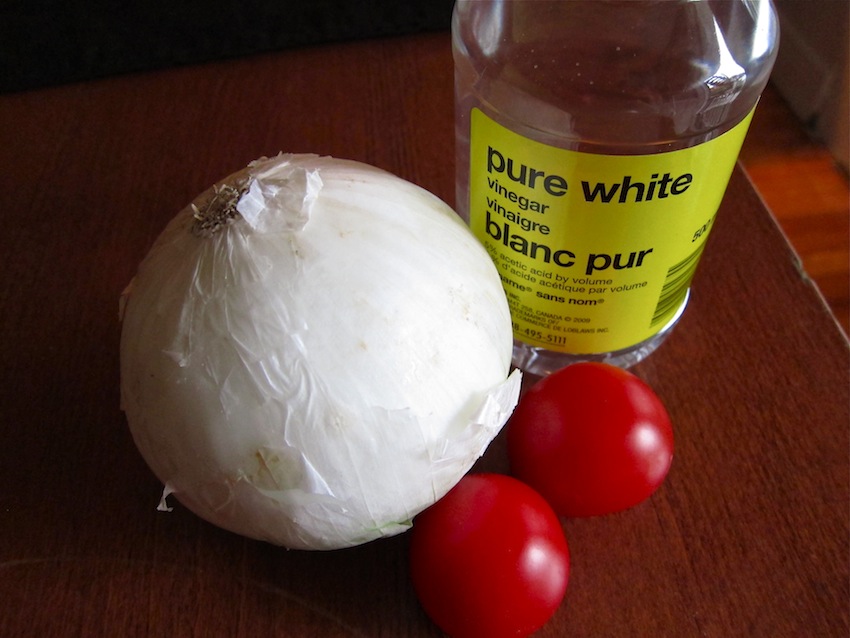
½ big white onion, diced extremely finely
White vinegar
2 small tomatoes, emptied and cut in very fine dices
2 tbsp vegetable oil
Salt

PREPARATION
Put the finely diced onions in a bowl. Cover completely with white vinegar. Add the tomatoes and the vegetable oil. Add some salt to taste (you need at least 1 tbsp).


Serve on top of a whole grilled fish of fish fillets. In the Caribbean they use Red Snapper. I used Pangasius and it was delicious!