Saturday, October 27, 2012

WORTH SHARING A MILLION TIMES: MISO AND MAPLE SYRUP GLAZE


I think of this blog pretty much every day but I’m a terrible friend to it. I neglect it and don’t really take care of it. But today is a day I decide to make an effort to make it happy… to make it smile!

Be prepared, this terribly simple recipe is super delectable and your entire family will love it, including kids and babies… I’ve tried it and it works. You want a nice fast and healthy dinner? This is the best recipe you’ll have tried in months!! I made mine with nice jasmine rice and garlic spinach. The fish took 12 minutes to make (4 to prepare, 8 to cook), which is less than the rice, which took 20! Try to beat that Jamie Oliver with your 30 minutes meal!!!

Picture taken for Ricardo's website... I didn't have time to take a picture myself!


MISO AND MAPLE SYRUP GLAZE
Makes 2 large fillets or 4 fish steaks
(Good for salmon, trout, pork and chicken)

INGREDIENTS
¼ cup maple syrup
2 tbsp miso paste
2 tbsp grapeseed oil (or olive oil)
2 green onions or 1 shallot, finely chopped
1 tbsp sambal olek (or an asian hot sauce)
1 tsp curry powder
½ tsp Sichuan peppercorns, crushed

PREPARATION
Sauce
Blend together all of the ingredients.

Cooking the fish
Place 4 fish steaks or 2 large fillets of your choice on a baking sheet lined with parchment paper (the sauce will caramelized once cooked) and generously brush with the miso and maple syrup glaze. Bake in the center of the oven, under the broiler, for 5 to 10 minutes, depending on the type of fish, or until cooked (be careful not to overcook your fish). Serve hot with rice and a nice green vegetable!!


Monday, June 11, 2012

‘Tis The Season For Fiddlehead Fern… But Hurry Up It’s Almost Over!


Fiddlehead Fern is a vegetable I simply loooove. If your main language is English, you might be thinking ‘what is that?’. If you speak French, you might know this vegetable under the name of Crosse de Fougère or Tête de violon. Basically, it’s the head of the fern that you cultivate before it grows out… which mean it’s only available in spring, before the plant becomes too big. Mid-April to June is the best time to buy this amazingly tasty vegetable.

If you’ve never prepared Fiddlehead Ferns, don’t be grossed out by their appearance. They can indeed put some people off. Instead, take the time to wash them out a few times in cold water, trying to clean out the dirt as much as possible. After that, prepare two small separate pots filled with salted water. Bring the water to a boil, throw the ferns in the first pot, and cook them for 3 minutes. Take them out and quickly throw them in the second pot. Cook for another 2 minutes. Once they’re done, rinse them out in cold water to stop the cooking.

Once the cleaning and cooking is done, you’re ready to eat these little gems (they can be quite expensive at the beginning of the season). I love them pan seared with butter, garlic and salt. Otherwise you can prepare a great vinaigrette and prepare the Fiddlehead Ferns as a salad. This is the recipe I’m suggesting to you… 

Pre cooked Fiddlehead Ferns

Twice cooked Fiddlehead Ferns


FIDDLEHEAD FERN SALAD
Makes 2 servings

INGREDIENTS
Salad
A nice bunch of cooked Fiddlehead Ferns
4 radish, finely sliced
2 lebanese cucumbers, finely sliced
A little bit of fresh baby arugula

Salad Dressing
1 tbsp Dijon Mustard
¼ cup Apple cider vinegar
¼ cup White balsamic vinegar
1 cup olive oil
1 garlic clove, pressed
Salt and pepper to taste

PREPARATION
Salad Dressing
In a small bowl or jar, mix all the ingredients. Adjust seasoning.

Salad
In a bowl, mix all the vegetables and add the salad dressing. Mix well. Adjust seasoning.

This version of a salad is really simple but you can let your imagination go where you want it to go. You could add cheese, tomatoes, olives, etc. Go wild!!

Tuesday, June 5, 2012

STAYING ALIVE, STILL ALIVE!


Ok, so I’ve totally been neglecting this super blog. Have you forgotten about me? I sure haven’t forgotten about you! I just needed a little time off. After all, I'm still on maternity leave. And I have to admit I felt writing on this blog had become an obligation, like a job… I just wasn’t having as much fun with it as I used to. But I still cook and I still love doing it. So now I have to start sharing the goods again just maybe, a little differently this time.

I think I’m going to start adding a few things. If you agree with me, I’d love to start talking about restaurants, interesting articles I come about, things like that. And of course, I’m going to keep on feeding you some great recipes! How does that sound? That way I get to diversify myself but I’ll still be showing great recipes added to where I get my ideas, inspiration and what really make me flip as a foodie!!

I hope this will satisfy you (I think it’ll satisfy me!) and that you’ll keep on reading and supporting this little thing I do. I just love the idea of food so much, I can’t let it go! 


Lets keep going! 


Thursday, January 12, 2012

This Will Make Your Weekend: Sausage Wrapped Poached Eggs


It’s snowing outside and I just found out I have a bronchitis. Nice way to start the year. On top of it, I’ve been procrastinating writing on this blog, for no particular reason. Actually, maybe there is a reason. The holidays were so hectic around here; this week feels like I’m on vacation! But I’ve been itching to write again and share my 2012 recipes. I don’t know how much I’ll be able to keep up with my writing though… I should be going back to work soon… as long as I find myself a job!

Besides that, I tried this amazing recipe last weekend while some friends were over for breakfast. I didn’t invent this recipe; I found it in a magazine while I was sitting by the pool someplace hot in the South! Yeah I know… deciding to make some crazy good-looking recipe while tanning is not a good idea. This is decadent. It looked good under the sun and it was even better back here, in the winter cold! And don’t get fooled by the look of it, it’s quite simple to make and could even make a great activity for you and your kids!

SAUSAGE WRAPPED POACHED EGGS
Makes 8 servings

INGREDIENTS
10 large eggs
16 small breakfast sausage
1 ½ cups flour
2 cups Corn Flakes
Salt & pepper
Vegetable oil

PREPARATION
Put 8 of the uncooked eggs in a saucepan and cover them with cold water. Put over high heat and bring to a boil. Remove from heat, cover and let stand for 3 minutes.


Carefully drain. Then fill the saucepan with cold water to cool the eggs. Gently crack the shells under cold running water. Set aside.

Take the sausage out of its casing. Make 8 equal portions and make them into thin patties over the length of your palm. Lay 1 soft-boiled egg on top of the sausage and delicately wrap it around the egg. Repeat with the remaining eggs.


Place the flour in a wide shallow bowl and crushed corn flakes in another one. Whisk the remaining 2 eggs in a bowl.

Working gently with 1 sausage-wrapped egg, dip it in the flour, then coat in the egg wash. Finish by rolling it in the crushed corn flakes.

Attach a deep fry thermometer to the side of a heavy pot. Pour in some oil to a depth of about 2” and heat over medium heat to 350˚F. Fry the eggs, turning occasionally and maintaining oil temperature at 350˚F until the sausage is cooked through and the breading is golden brown and crisp. This should take about 5-6 minutes. Use a slotted spoon to transfer the eggs to paper towels to drain the excess oil.

Lightly season with salt and pepper. Serve warm.

Note: You can boil your eggs and make the sausage wrap a day in advance.


Monday, December 26, 2011

It’s Been One Year For Figareau’s Blog… And Merry Christmas To All!!!


Arrgggg! Sometimes I hate technology! I’ve been away on vacation for the past 2 weeks to enjoy a bit of family time before the hectic days of Christmas. During that time, I was meant to post a few recipes and, this text! I brought my computer along with me specifically to write this in celebration of my blog’s first anniversary. But technology was against me; I had no Internet connection!!! Which is why I post this a few days late. Forgive me and celebrate with me this great achievement!

*****

Today is celebration time so lets pop some champagne!!! I’ve been writing this blog for exactly one year today and OH! what a joy ride it’s been!


It isn’t easy to always keep up with writing… especially since I have to cook to be able to write. And this year has been a handful: a baby was born, some serious renovation was done, some great vacationing was enjoyed, and some sick kids were taken care of. I’m on maternity leave, it’s true, which means I should have more time on my hands to cook; but life isn’t always that easy and cooking hasn’t always come that easily. But I have stood my ground and have kept up with the pace. Writing for a full year is a great pride for me.

I realize I have some amazing readers and without you it would be meaningless. Some of you have read every single line I’ve written… and I thank you for doing so. This experience feels like the greatest diary experience ever (much better than what I used to write about when I was a kid… that no one used to read!). It’s also a dream come true. I get to write a lot, which I’ve always dreamt of doing; I get to cook a lot, which is second nature to me; and I get to share it all with amazing people which gives it all a great meaning.

Thank you for trusting my cooking and my writing. I will try to keep up the pace for another year.

Sincerely,

Sophie aka Figareau  

Tuesday, December 13, 2011

Red Snapper For An Easy Weeknight


I find that I always eat the same kind of fish… and it gets me bored. I absolutely love salmon in all its forms (except when it’s overcooked) but I need a change once in a while. So the other day I was at Adonis, an amazing supermarket here in Montreal (we don’t have Whole Foods yet but we have Adonis!) and was looking at the fish they had… and they had this great looking Red Snapper that got me going! I found a nice looking recipe on the web and modified it a little. It was fantastic! If you try it with my previous quinoa recipe I promise you a great meal!

CREOLE RED SNAPPER FILLETS
Makes 2 servings

INGREDIENTS
2 red snapper fillets (or 1 entire fish if you know how to make your own fillets!)
4 tbsp butter, cut in small dices
1 garlic clove, minced
6 drops of Worcestershire sauce
1 tbsp Creole or Cajun seasoning (with salt)
Pepper

PREPARATION
Preheat your oven at 400˚F.


In a small bowl, melt the butter. Add the garlic, Worcestershire, Creole seasoning and pepper. Mix well.

Place your fillets in an ovenproof dish. Evenly spread the butter mixture on top. Cook in the oven for about 10 minutes. 


Saturday, December 10, 2011

Rough Night... Nice And Tasty Side: Quinoa


Rough night!! Last night I made food for 125 people. You read that right! Not 12 but 125 hungry, eager eaters. It was absolutely A-M-A-Z-I-N-G (in my own opinion!). Making food for such a great number of people is an obvious challenge, not such in terms of food itself but it terms of planning. Preparing food is not just about putting good ingredients together; it’s also about planning each and every step of the way as well as attaining a perfect timing. Food needs to be fresh and tasty; hot and striking. This kind of an experience is also an incredible rush, a true flood or adrenaline… And one could get hooked to it. I must say I loooove a good challenge and this one, which was given to me by trustful people (thank you, you know who you are!), was one I took on like a bull and ended like a swan (I know, that sounds weird but I felt it ended in such a graceful way that it made me feel like a swan!!).

Anyways, when you go through such a rush of adrenaline, you need a really good break. The glass of wine at the end of the night was absolutely well deserved and the chatting and mingling with the people who devoured the food was a breeze, a relaxing and unwinding moment. Today, I might need more than my usual single cup of coffee and a take out dinner tonight might be what we end up eating. Because spending such great time in your kitchen means hours of pleasure, you still need to get away from it once in a while. It’s like great love: you need a little bit of space here and there to remember how big your love is when you get back to it!

On this note, enjoy some easy quinoa today (or tomorrow!) and enjoy a beautiful day!

QUINOA SIDEDISH
Makes about 6 servings

INGREDIENTS
1 cup quinoa
2 cups chicken broth
1 dried chipotle
1 tbsp olive oil
½ onion, finely diced
½ red bell pepper, finely diced
1 garlic clove, minced

PREPARATION
In a small pot, put your quinoa, chicken broth and chipotle. Bring the broth to a boil. Bring the heat down and cook for about 20 minutes.

In a small pan, heat the olive oil over medium heat. Add the onions and the peppers and cook for a few minutes. Add the garlic and cook for another minute or two. Take off the heat.


When the quinoa is ready, add in the cooked onions and peppers. Mix well and serve immediately.


Monday, December 5, 2011

Roasted Chicken Never Goes Out Of Style


If I had to pick one ingredient to bring on a deserted island and if I had to eat day after day, I think it would be chicken. I just never get bored of it and you can prepare it in so many different ways. The possibilities with chicken are endless. There simply are not rules as to how to prepare it. On top of it, if you like the brown part better (which is the case for me!), it’s a pretty cheap meat to buy and won’t make a whole in your pocket!

I was having a hard time this summer cooking some nice warm meals. I’m more of a fish and salad kind of person during the summer but now that the fall is almost over and that winter is knocking at our doors, I’m back in the mood of cooking some heartwarming dishes. This is a super easy one perfect for nice family dinners.


SIMPLE ROASTED CHICKEN
Makes 4 to 6 servings

INGREDIENTS
1 big chicken (ideally free –range or organic)
½ cup butter, in cubes
1 tbsp olive oil
1 lemon
½ onion, chopped
½ cup Vermouth
½ cup chicken broth
1 cup mushrooms (optional)
Kosher salt and pepper

PREPARATION
Preheat your oven at 475˚F.

Put the onions and the mushrooms at the bottom of an ovenproof deep dish. Poor the Vermouth and chicken broth on top. Season with salt & pepper.

On a cutting board, take the chicken and delicately lift the skin off. Put some butter cubes under the skin all around the chicken. Once you’re done, place it breast side up on top of the onions and mushrooms. Drizzle the olive oil on top of the chicken. Season with salt and pepper.


Take the lemon and carefully prick it all over, using the tip of a sharp knife and stuff it in the “bottom” of the chicken (in its cavity!).


Put the ovenproof dish in the oven and immediately bring the heat down to 400˚F. Cook the chicken for 1 hour and 20 minutes.

When ready, place your chicken on a cutting board and let it rest for 10 to 15 minutes. Carve out the chicken and serve immediately.


Note: Putting a lemon inside the chicken will tenderize the meat.

If you’d like to make a full dish out of this, you can add some potatoes. The best way is to add them in about half an hour after you’ve put the chicken in (about 50 minutes left). 

Saturday, December 3, 2011

Little Quicky: Scallop Carpaccio


I’m in the mood to share this little recipe with all of you lovely readers. Because it is nice and sunny in Montreal and because I’m having a relaxing moment on this Saturday while my kids are napping (both at the same time is what I call a miracle!). I don’t have much time but I believe I have just enough to share this simple recipe with you. Ok, it’s seafood – AGAIN - I hope you don’t mind too much. I’ll give it a break after this and switch to some meat… and sugar (I’m due for a good desert!). If you’re a seafood lover, then I guess you are well served these days!

FRESH SCALLOP CARPACCIO
Makes 4 servings

INGREDIENTS
6 big scallops
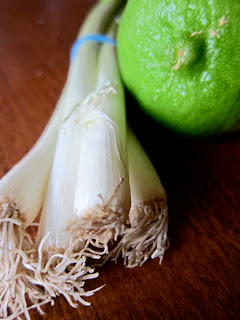
2 green scallions, finely sliced
2 tbsp excellent olive oil
2 tbsp fresh lime juice
1 tbsp poppy seeds
Maldon sea salt flakes


PREPARATION
In a small bowl mix together the olive oil, lime juice and scallions.


In a small skillet, slightly toast the poppy seeds. Be careful not to burn them. Take off the heat and let cool.


With a good knife, delicately slice your scallops. The slices should be no more than 3mm. Place them on small serving plates.


Drizzle the scallops with the olive oil and lime juice mixture. Decorate with a few pinches of roasted poppy seeds. Finish off with a nice pinch of sea salt flakes. Serve and enjoy immediately.


Friday, December 2, 2011

Par Ici La Sortie!


C’est aujourd’hui le grand jour. Ne manquez pas l’émission Par Ici La Sortie! (chaîne 91 ou 691 sur illico de Vidéotron) ce soir, à 21h30. Tout au long de la semaine vous pourrez voir l’émission en reprise.

Bon visionnement !


http://www.mlle.ca/emissions/paricilasortie/episodes